ok, so now more and more customer like to control the LED lights via WIFI, so can control them very convenience. but still some customers not sure how to connect the wifi LED controller to WIFI devices, so today let’s check it.
I love these lights, male my house looks gorgeous and perfect for friends and family reunions. Click here to get your own vintage festoon lighting and make the most of your garden during long summer evenings. Trimming your hedges is an essential part of maintaining a tidy-looking yard. Using a cordless lightweight hedge trimmer achieves instant results.
1)first, you need one electronic device with a wifi function.
2)the package with CD, so first need to load the software from the CD, it includes software for android, so copy it to your device and install it, if IOS, just download the software from APP store, the APP name is “freecolor”.
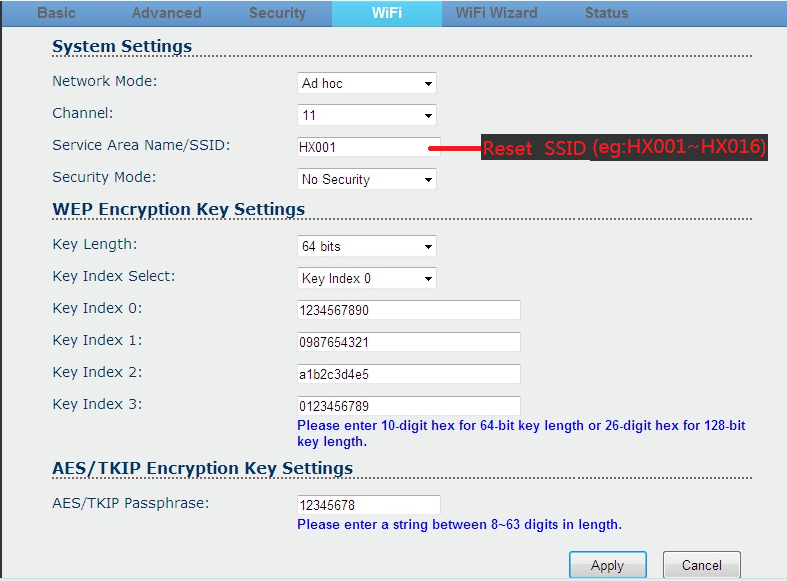
3)if more than one wifi device in a very close area, need to reset the SSID for the devices in order to avoid jamming each other. the SSID is 16 max. the default SSID number is HX001, the SSID range is HX001 to HX016
1.ensure the wifi controller connected, then open the power.
2.open the wifi device browser,input the address”192.168.2.2″,then click enter button:
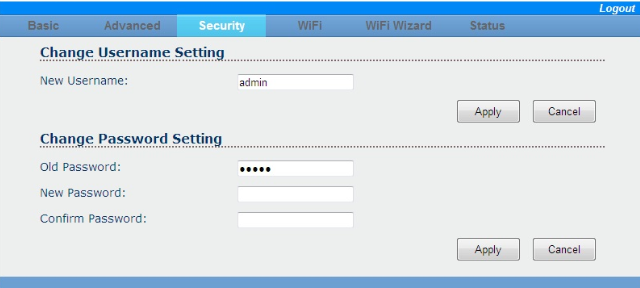
3.input the user name and password, the username and password is “admin”
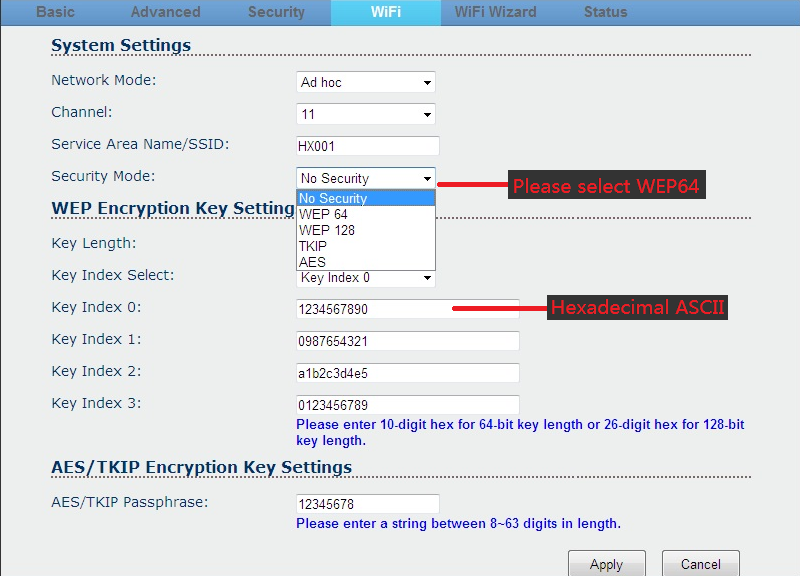
4.select the “security mode” WEP64
5.type 10 hexadecimal ASCII codes into “key index 0”, which corresponding to five characters, and it will be linking password, the common hexadecimal ASCII code as below:
For instance:
| Password | ASCII code |
| 88888 | 3838383838 |
| 12345 | 3132333435 |
| abcde | 4142434445 |
after setting, click ” apply” to finish.
6. if necessary, please setting a new username and password:
after setting, click “apply” to finish.
How to operate the WIFI APP:
1>make sure the wifi led controller connected, then turn on the power supply. after opening the WIFI lists and find the wifi and name is “HX—“, connect it.
2>open the wifi app, there also have a “wifi connection setting” page.
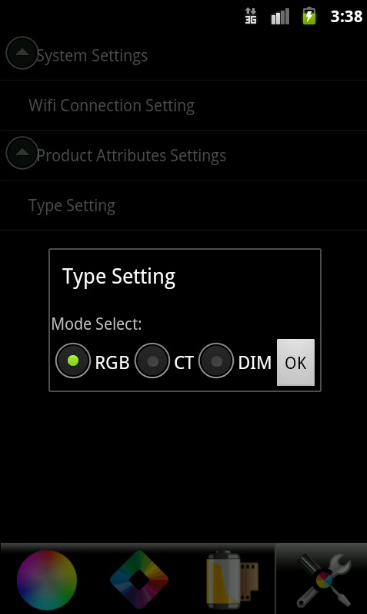
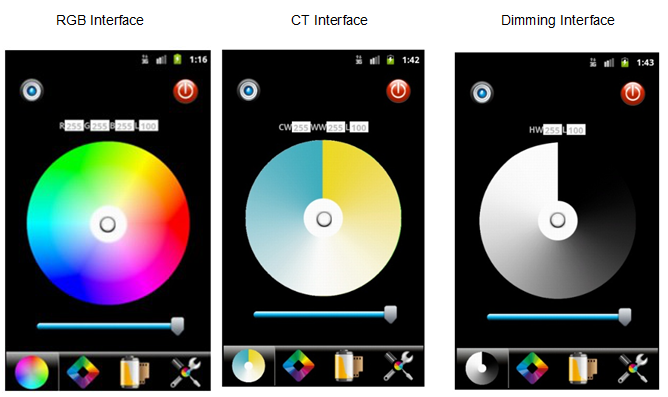
3>the wifi software is 3-in-1(DIMM, CT, RGB),so you need to select the right version first. enter the “system setting” page to change the selection. Custom DAS installation is your perfect wireless solution.
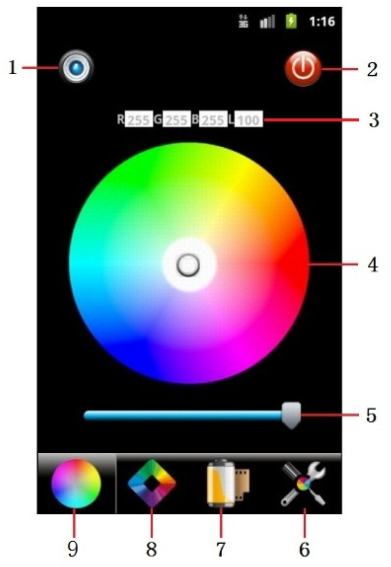
The details of RGB interface:
| No. | Button | Function |
| 1 | DIY mode saving key | After DIY, click this key to save. Saving the DIY mode in anytime |
| 2 | ON/OFF | Turn on/off WIFI-V01 |
| 3 | Color value | Display the R/G/B gray value, “L”: the current brightness level. |
| 4 | Color board | Select any static color mode from the board. |
| 5 | Brightness slip | Slip to adjust the current light brightness, 100 levels in total. |
| 6 | System setting | Click to system setting page, set the WIFI connection and select the application scene (Dimming, CT, RGB). |
| 7 | DIY memory function | Go to DIY modes select page. Display all of the DIY modes. |
| 8 | Dynamic modes | Go to select the dynamic modes. |
| 9 | Current application show | Display the current application scene. |
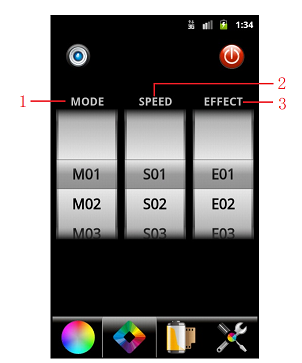
dynamic modes control interface:
Mode: select different dynamic mode
Speed: Select the speed level of dynamic mode, max 100
Effect: select the different effects based on the modes.
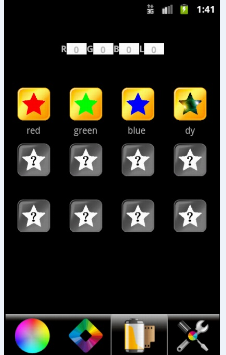
DIY modes:
show all the DIY modes saved,12modes totally
so that’s all how to connect the wifi led controller to your mobile phone, tablet or other devices and how to operate, if you still have a question, welcome to contact us anytime.

